
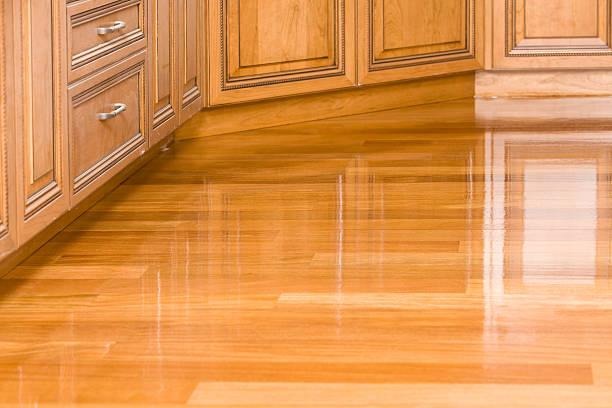
After a decade spent restoring hardwood floors in homes of every style and age, I can say with certainty that few projects deliver such dramatic transformation at such a reasonable cost. Hardwood floors carry history. They show every pet claw, every furniture shift, every season of sunlight. Yet they also hold the potential to look brand new again. Residential hardwood floor refinishing is not simply a repair. It is a careful restoration that returns warmth, depth, and value to the heart of a home.
Why Refinishing Beats Replacement Almost Every Time
Most solid hardwood floors installed in the last century still have plenty of life left in them. A full sand-and-refinish removes the worn finish and a thin layer of wood, erasing scratches, dullness, and surface stains while preserving the original boards. Replacement, by contrast, requires tearing out the existing floor, disposing of materials, and installing new wood. That process costs significantly more and generates far more disruption.
In my experience, refinishing costs roughly half to two-thirds less than installing new hardwood of comparable quality. The result looks nearly identical to a brand-new floor, and the character of the original wood—its grain patterns, its subtle variations—remains intact. For homeowners preparing to sell, refinished floors consistently rank among the improvements that deliver the strongest return. Buyers notice them immediately. They photograph well. They signal care.
Signs Your Floors Are Ready for Refinishing
Not every floor needs a full refinish. Light surface dullness or minor scuffs can often be addressed with a screen-and-recoat, a lighter process that abrades the existing finish and applies fresh protective coats. Full refinishing becomes necessary when you see deep scratches that catch the light, worn pathways where bare wood is visible, uneven color from years of sun exposure, or a finish that has begun to flake or peel.
Water stains that have penetrated the wood, pet urine marks that have darkened the grain, and previous amateur staining that left blotches all require sanding back to bare wood. If more than a few boards are cupped, warped, or severely damaged, those boards should be replaced before sanding begins. A professional assessment early in the process prevents surprises later.
The Refinishing Process Explained
A proper refinishing job follows a clear sequence that cannot be rushed.
First comes preparation. Furniture is moved or carefully protected. Nails are set below the surface. Loose boards are secured. Any necessary repairs—filling gaps, replacing damaged sections—are completed. The entire area is vacuumed thoroughly so no grit remains to interfere with the sanding machines.
Sanding is the heart of the work. A drum sander removes the old finish and a controlled amount of wood across the main field of the floor. An edger reaches the perimeter and corners. Progressive grits, typically moving from coarse to fine, create a smooth, even surface free of swirl marks and ridges. Dust collection systems now capture most of the airborne particles at the source, though residual fine dust still requires careful cleanup.
Once the wood is bare and clean, the optional staining stage begins. This is where homeowners can change the color of their floors entirely—darkening a light oak, warming a cool maple, or matching an existing trim color. Stain must be applied evenly and allowed to dry completely. A sealer coat follows, locking in the color and preparing the surface for the final finish.
The protective topcoats come next. Most residential projects receive two or three coats of polyurethane. Oil-based formulas produce a warm amber tone and exceptional durability. Water-based formulas dry clearer, with less odor and faster recoat times. Between coats, a light screening creates the ideal surface for adhesion. The final coat is left to cure fully before the floors can accept furniture and regular traffic.
The entire process for an average home typically spans four to six days, depending on the size of the area, the number of coats, and drying conditions. During that time, the household should minimize foot traffic and avoid introducing dust or moisture.
Choosing the Right Finish and Sheen
Finish selection shapes both appearance and long-term performance. Oil-based polyurethane remains popular for its rich look and toughness under heavy use. Water-based options suit homeowners who prefer a more natural wood tone and want lower VOC levels during application. Hardwax oils offer a matte, European aesthetic and allow easier spot repairs, though they require more frequent maintenance.
Sheen level matters as much as the chemistry. Gloss highlights every detail and can make a room feel brighter, but it also shows scratches more readily. Semi-gloss strikes a balanced middle ground. Satin delivers a softer, more contemporary look that conceals minor wear better over time. I always encourage clients to view sample boards in their actual lighting before deciding.
Caring for Your Newly Refinished Floors
A well-executed refinish can last seven to fifteen years with proper care. Use felt pads under furniture legs. Sweep or vacuum regularly with a soft brush attachment. Wipe spills promptly. Avoid steam mops and excessive water. Place walk-off mats at exterior doors to reduce tracked-in grit. Periodic screening and recoating every few years can extend the life of the finish without the need for another full sanding.
The Lasting Reward
Hardwood floors are one of the few surfaces in a home that improve with thoughtful maintenance rather than decline. Refinishing does more than erase years of wear. It restores the quiet luxury of real wood underfoot—the way light moves across the grain, the solid feel that no laminate can match, the sense that the house itself has been cared for.
When done correctly by experienced hands, residential hardwood floor refinishing is both practical and transformative. It protects an existing investment, elevates daily living, and leaves a home looking its best for years to come.